A tinker kit is an excellent concept that allows children to explore, be creative, learn through trial and error, and discover their talents. And to create the perfect space filled with opportunities to learn and play, introducing tinker kits is one of the best options.
To make your own tinker kit for free, start with the things that are already available at your home.
Here are a few great ideas to make your own kits for kids to explore, create, and get started with tinkering.
Cupid’s Bow and Arrow Kit

A simple but creative activity, this kit contains things your child will need to make Cupid’s bow and arrow. This activity will keep the kids engaged and sharpen their engineering skills.
You can help them with the planning and design but make sure you let them do the execution part on their own!
Materials
- Popsicle sticks
- Dental floss
- Cotton swabs
- Nail clipper
- A bowl of water, preferably warm
Directions
- Soak the popsicle sticks in water until they soften. This may take about an hour.
- Take the sticks out of the water and dry them with a paper towel.
- Cut out a small notch on either side of the popsicle stick on both ends.
- Slightly bend the popsicle stick into a curve and tie the dental floss around the notches connecting both ends of the stick. You can also decorate the bow using stickers or markers.
- To make the arrows, simply cut off one end of a cotton swab.
Takeaway
This is a great activity to practice a bit of math like measuring the distance and cutting out equal notches. Besides, the kids will have to use their engineering skills to make a proper bow and arrow.
You can also teach Newton’s Third Law of Motion through this activity – for every action, there is an opposite and equal reaction.
Explain and demonstrate how the arrow flies through the air the moment you release the bow string. Depending on the age, you can also explain the concept of potential energy and how the energy is transferred from the string to the arrow once you release the string.
Tornado Kit

Here’s another great activity that would make a good tinker kit. Although kids know that a tornado is a storm, they may not be familiar with the science behind it. This is a simple activity that can demonstrate how a tornado forms and what it looks like.
Materials required
- Two 1 litre bottles
- Food coloring, preferably blue
- Duct tape
- Metal washer
Directions
- Fill 3/4th of one bottle with water.
- Pour a few drops of food coloring in the water.
- Place the metal washer on top of the bottle neck.
- Keep the second bottle upside down on top of the metal washer (which sits on top of the first bottle’s neck). Note that the washer should not be too big or too small for the bottle opening.
- Tape the two bottles together using duct tape.
- After ensuring that the two bottles are taped tight, flip the bottles so that the water in the first bottle flows into the second.
- As the water flows into the second bottle, you will see a funnel forming inside the bottle. The spiral movement of the water will look just like a tornado. Eventually, the funnel will become wider and extend towards the base of the bottle, forming a vortex.
Takeaway
Explain to your kids what a tornado is, along with the science behind it. A tornado is a violent windstorm rotating rapidly extending from a thunderstorm to the ground. It forms due to the collision of warm, humid air with cold, dry air. As the warm air rises through the cold air, the rotating cylinder of air narrows and spins faster, forming a tornado.
Catapult Kit

Children are always fascinated by catapults. A catapult is a device that can propel things in a projectile motion. You can make your own tinker kit that includes materials to make a catapult. It’s easy, interesting, and fun. Let’s get started!
Materials required
- Popsicle sticks
- Rubber bands
- Plastic spoon
- Pom pom ball
Directions
- Stack 7 popsicle sticks and bind them together on both sides using rubber bands.
- Stack 2 popsicle sticks and tie them together on both ends using rubber bands.
- Now pull apart the two popsicle sticks and keep the stack of 7 popsicle sticks between them.
- Take the plastic spoon and tie it to the upper popsicle stick using a rubber band.
- Place the pom pom ball onto the spoon.
- Hold the catapult with one hand and push down the spoon.
- Release the spoon and watch the pom pom ball fly high!
Takeaway
You can teach Newton’s Three Laws of Motion using this activity: 1. An object will not change its motion unless a force acts on it, 2. An external force on a body produces an acceleration of the body, and 3. Every action has an equal and opposite reaction.
Tell your child that the catapult does not move unless a force acts on it. While pushing the spoon and letting go of it, tell your child how the ball flies into the air when the release of the spoon produces an upward acceleration.
Rocket Kit
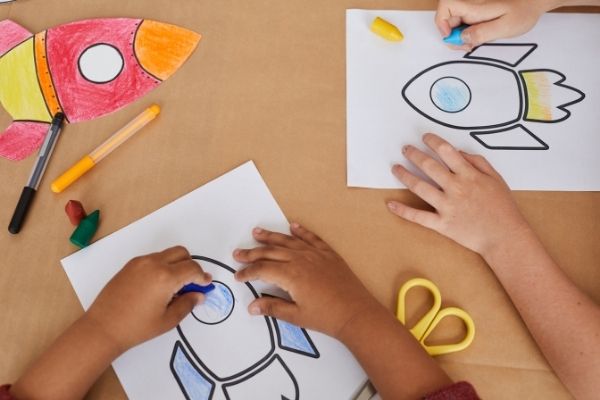
Children love playing with toy rockets. And launching them would be even more fun. Here is an excellent tinker kit that you can make for your kids with supplies required to make a rocket. You can also teach the concept of gravity using this easy, fun, and exciting activity.
Materials required
- Straws of two sizes (Big and small)
- Tape
- Printable rocket sheet (Print out 1 per child and have the kids can color them in)
- Scissors
Directions
- Take the big straw and tape it to the back of the rocket paper cut out. You can also use a plastic pipette instead of the big straw.
- Insert the smaller straw into the bigger one.
- Now blow into the straw. You can see the rockets take off.
Takeaway
Encourage your children to try launching the rockets at different angles. Ask them to measure the distance the rocket traveled and record the results. You can also explain the concept of gravity using this activity. Explain to the kids that the ball hit the ground instead of remaining in the air due to gravity and air friction.
Frequently Asked Questions

What is a tinker box?
A tinker box is a kit filled with supplies that children can tinker with. The purpose of a tinker kit is to create a space for children to explore, learn, and boost their creativity with minimal guidance.
What age is a tinker kit for?
Tinker kits can be used by children of any age. You just need to include materials that are age appropriate as that of the user.